
Photo: Lukas
- Intro
- Preface & Preamble
- Step 1 – Create a Meta Developer Account
- Step 2 – Create an App for Threads
- Step 3 – Intro to APIs & Getting Your Access Token
- Step 4 – Pull Metrics
- Step 5 – Auto-Looping to Pull All Post Metrics
- Step 6 – Analyzing & Example Use Cases
- Closing
Intro
Would you like to get more info on how your posts on Threads are performing? Do you have a little bit of tech-savvy nature and curiosity to poke around with some light code?
This guide will help walk through the very basics of how to connect to the Threads API and pull metrics along with some basic use cases and examples.
Get stuck? Comment on this post or message me on Threads and I’d be happy to help.
I do recommend setting aside a chunk of time to walk through this or plan to pick away at it over a few days. As in my experience with coding, sometimes very basic issues can be resolved with taking a break and coming back with fresh eyes.
If people comment with enough interest, I could do up a section or new post on Instagram API and pulling metrics (as the process is fairly similar).
Preface & Preamble
This is a semi-technical guide, though I’ll write the steps as simplified as possible so that most people should be able to go through the steps. If you have the time, their technical documents are good to skim through to fully understand (though they sometimes go into more detail than most people would need and they sprinkle information in a few different places, whereas this guide consolidates it all into one). The way these calls function may change, but I’ll update it periodically as I notice or as other people mention to me.
If you’re not interested in a technical dive, I recommend checking out my other post on Tips and Tricks for Writers on Social Media, which gives more general strategies for maximizing your reach on social media.
I would also be remiss if I didn’t also call out my post on The Rule of One & Social Media Engagement. While the steps of this guide will help you pull metrics for Threads, it is important to recognize the mental health side of being focused on numbers or performance-driven on social media.
With all that being said, let’s get into it!
Step 1 – Create a Meta Developer Account
If you don’t already have one, the first step is to register as a Meta Developer (oooh fancy!). Logged into your Facebook account, following this link will guide you through the registration steps to set up your developer account (https://developers.facebook.com/docs/development/register).
I’m unable to go through these steps again, and it’s been some time, so if you run into any odd parts of this process let me know in the comments and I can update this section (though it should be fairly straightforward at this point).
Step 2 – Create an App for Threads
Once you have your Meta Developer Account, navigate to the app section (https://developers.facebook.com/apps/?show_reminder=true ) and click on the green button saying “Create App”.
You’ll be asked if you want to link it to a business portfolio, I skipped this step personally and didn’t have issues (though the description does say that you might eventually need to link it).

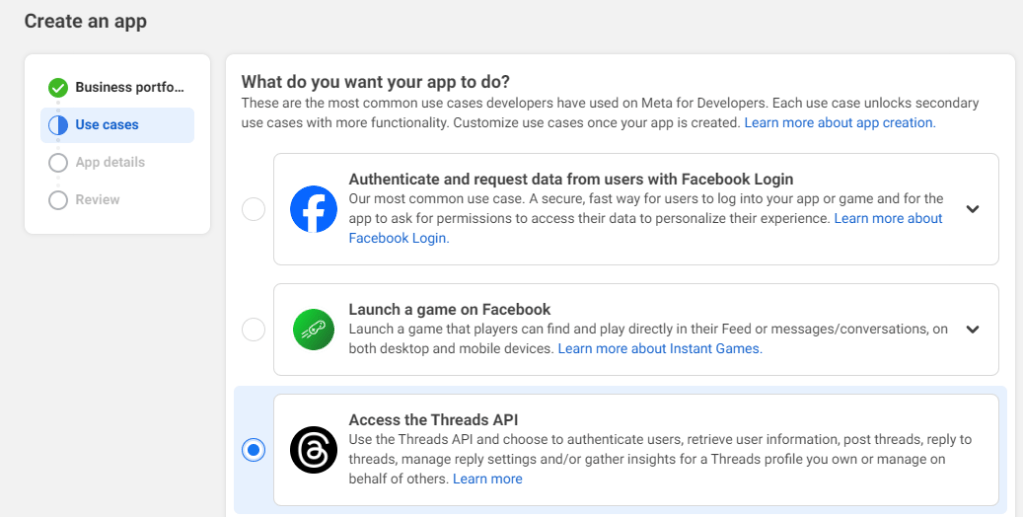
You’ll then want to select the Threads Use Case and on the next page you’ll then give a name for your app and a contact email.
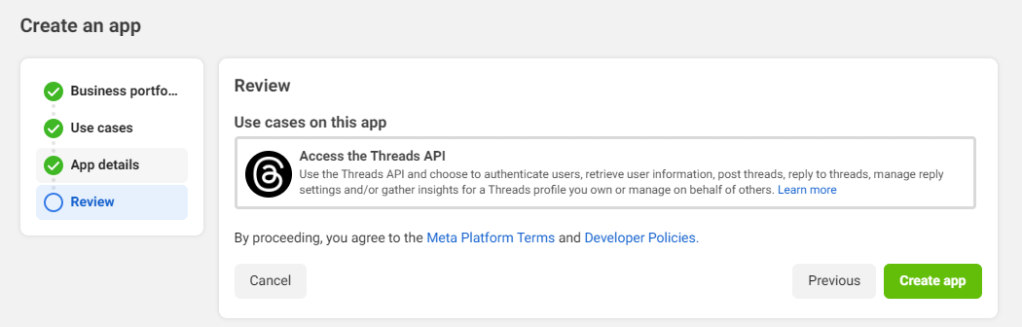
After you’ve entered all those details, click “Create app” and be taken to the App’s Dashboard.
You’ll then need to go through a few steps to finish customizing your your app. Click on “Access the Threads API” to start.

For our purposes, you only need the threads_basic and threads_manage_insights permissions. You can add other permissions, but if this is your first time working with API I recommend only starting with these two. The other permissions will give you access to other API calls including write access, which means you can modify, or post information (which you may not want to and unintentionally do something).

In the “Settings” tab, you’ll want to click on “Add or Remove Thread testers” (which is essentially which Threads accounts you’re going to pull metrics on). If you’re planning on doing something more intense in terms of building a fully automated application, you may also want to fill in the URLs (but for our purposes, I didn’t have to in order to pull some numbers ad hoc).

You’ll be taken to an App Roles section. Here you’ll want to click on “Add People”. Select “Threads Tester” and search for your Threads handle.

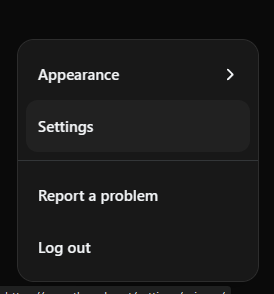
On your Threads account, you’ll need to go to Settings (from the bottom left, for me) > Account > Website Permissions > Invites. Accepting this gives permission for the App to run API calls against your provided Threads Tester user.

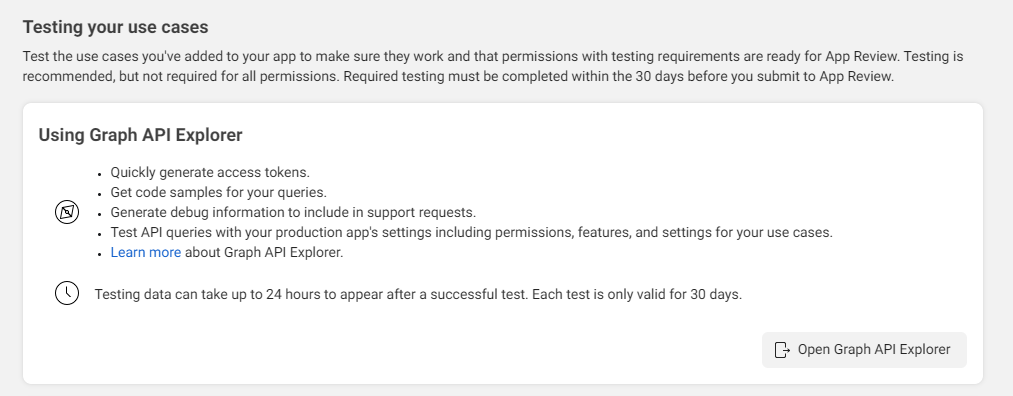
Back to the Dashboard, you can click on the next step of “Test use cases”. This is an optional step to do this at this point, but you could run some test API calls if you’d like and know what you’re doing (I’ll go through some tests in the next section).
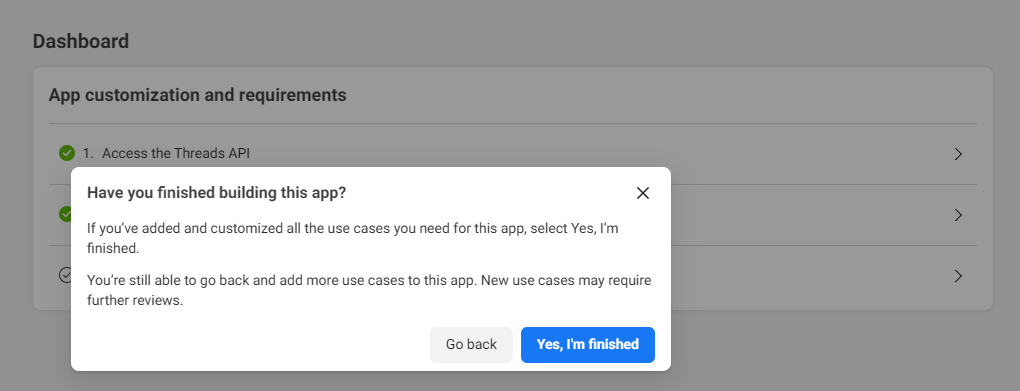
Back to the Dashboard again for the final step, clicking “Yes, I’m finished”.
And that’s the app setup! Nicely done. You could go a step further and submit it for approval as an app, but for my personal testing (at the time of writing this) I haven’t needed to for personal use.
If you want to dig into some of the settings and what they do (or add stuff we skipped), check out their documentation here: https://developers.facebook.com/docs/development/create-an-app/threads-use-case
Step 3 – Intro to APIs & Getting Your Access Token
If this is your first time running API calls, here’s a quick crash course on the concepts. I also recommend having Notepad open (or a similar temporary text app) to copy down certain information as we go.
- There are two types of ‘calls’ (instructions/actions) you can do with APIs in general
- POST – this is something that is sending information out to do something. Write, update, modify, delete, etc.
- GET – this is a pull of information
In order to do these, you’ll need to get your access token, which is basically a temporary key that allows you to run API calls.
For the ‘low code’/easy method, go back to the Testing page and click “Open Graph API Explorer”
Make sure you’re on the “Threads” URL (it may default you to Facebook).

Then on the right, click on “Generate Threads Access Token”, which will pop up an authorization window confirming you want to connect your app to your Threads user. Confirm that window.
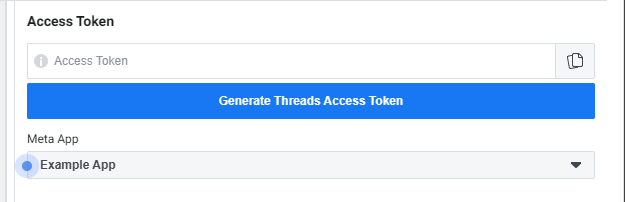
You’ll now have a long string of text that is your short-lived access token. For testing and playing around with API’s, I recommend starting with this. It’ll be a token that you can use and will expire in an hour from generation. Consider this like a password to the API calls, and handle it with care (ie, don’t write it down permanently in unsecure ways).
Why I recommend short-lived to start is that if someone got your long-lived access token, they could potentially do a bunch of API calls against your user for up to 90 days. (there are ways to prevent that/minimize the risk, etc, but for playing it safe to start I recommend doing a short-lived). If you want to move on to a longer-lived, check out https://developers.facebook.com/docs/threads/get-started/long-lived-tokens
To test if it’s working, type the following into the Graph API Explorer’s API url (for me this was defaulted) and hit submit.

me?fields=id,name
Which, if everything is set up correctly, should return you your Threads user id and name, like this.
{
“id”: “(number)”,
“name”: “(name)”
}
To go one step further to confirm the test is looking at the correct user, run this API call (https://developers.facebook.com/docs/threads/threads-profiles) by changing the API url to the following and hitting Submit
me?fields=id,username,name,threads_profile_picture_url,threads_biography
This should then return your profile information like so
{
“id”: “(number)”,
“username”: “(user)”,
“name”: “(name)”,
“threads_profile_picture_url”: “(url)”,
“threads_biography”: “(bio)”
}
Step 4 – Pull Metrics
At this point you can do quite a lot, but for the purposes of this post I’ll focus on pulling metrics (full documentation here). We’ll mainly be focused on the Insights section (https://developers.facebook.com/docs/threads/insights).
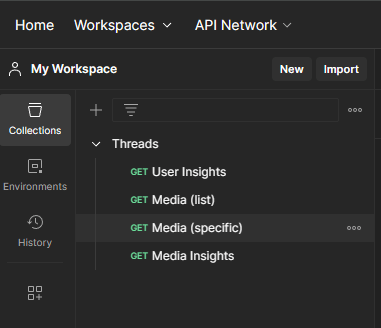
You can keep using the Graph API Explorer to mess around with, but if you’re semi-serious and plan on using these API calls a few times I’d recommend finding an API application to run your calls through. Personally, I use Postman for testing (there’s also automation it can do that I haven’t done much with yet, but is technically possible) as I can save my API calls and run them without having to look up the specific parts of the call. (though, if you’re using the short-lived access token, you’ll need to update that portion of your API calls).
If you don’t want to use Postman, you can just type out the whole URL in Graph API Explorer.
Metrics are housed in two sections
- Media Insights (metrics on your posts)
- User Insights (metrics on your profile)
User Insights
I’ll start with user insights as this can give you a quick glance of metrics over a period of time and things like demographics with one call. The Media insights is helpful, but you will likely need to do some level of looping automation to be less cumbersome (I’ll talk about that in the next section on parsing the data).
In postman your GET URL should look like this:
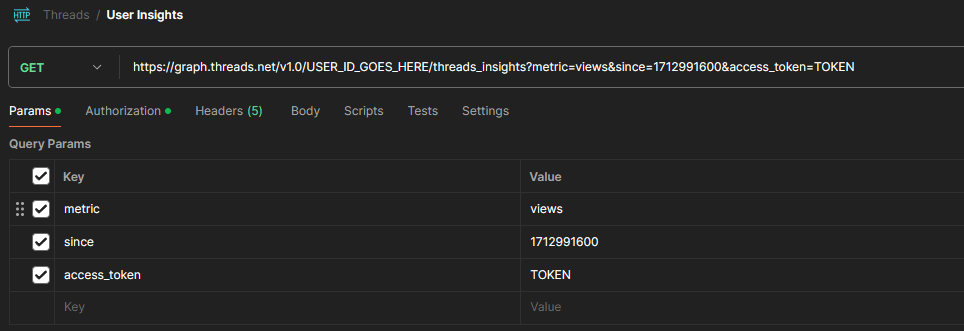
In Graph API Explorer, it’ll be like so:
USER_ID_GOES_HERE/threads_insights?metric=views

You can see what fields are available to pull here, and you can comma separate all the fields you want to pull in one go (for this example, I’m only looking at the metric=views. But you could do metric=views,text for example) If you want to return all records, input since=1712991600 (Unix number for seemingly when they turned on the feature). Note that most of these fields return lifetime totals, though the views field pulls in daily totals.
“name”: “views”,
“period”: “day”,
“values”: [
{
“value”: (number of views for that day),
“end_time”: “2024-04-13T07:00:00+0000”
},
And if you want the demographics, you’ll need to add the parameter “breakdown” with what you want to see, like age in this example

{
“name”: “follower_demographics”,
“period”: “day”,
“title”: “follower_demographics”,
“description”: “The demographic characteristics of followers, including countries, cities and gender distribution.”,
“total_value”: {
“breakdowns”: [
{
“dimension_keys”: [
“age”
],
Media Insights
If you’re looking to pull metrics relating to your posts you’ll need to do two steps, which you can do manually but as I’ll talk about in the next section is more helpful if you do a bit of data clean-up and automating with some technical finagling.
Step 1) Pull a list of ‘media’ (ie, thread posts) (ref: https://developers.facebook.com/docs/threads/threads-media). Using this call, you can specify which data you’d like to return, You can also see (broken out in my Postman call) the different variables going into this call. In this case, I want
- a list of thread posts and their respective (you can limit this to the specific fields you need by listing them and comma separating them)
- id,
- media_product_type,
- media_type,
- media_url,
- permalink,
- owner,
- username,
- text,
- timestamp,
- shortcode,
- thumbnail_url,
- children,is_quote_post
- between Jan 1 2024 and Aug 1 2024,
- I want to limit the returned list to 10
- my access token to authorize the request

You’ll then get a return that looks something like this
“data”: [
{
“id”: “(number1)”,
“media_product_type”: “THREADS”,
“media_type”: “TEXT_POST”,
“permalink”: “(link)”,
“owner”: {
“id”: “(number2)”
},
“username”: “(user)”,
“text”: “(post text)”,
“timestamp”: “2024-08-08T23:56:38+0000”,
“shortcode”: “(text)”,
“is_quote_post”: false
},
Step 2) Using one of the ids from that list (number1, in the example above), Pull the metrics for that post (ref: https://developers.facebook.com/docs/threads/insights#media-insights )
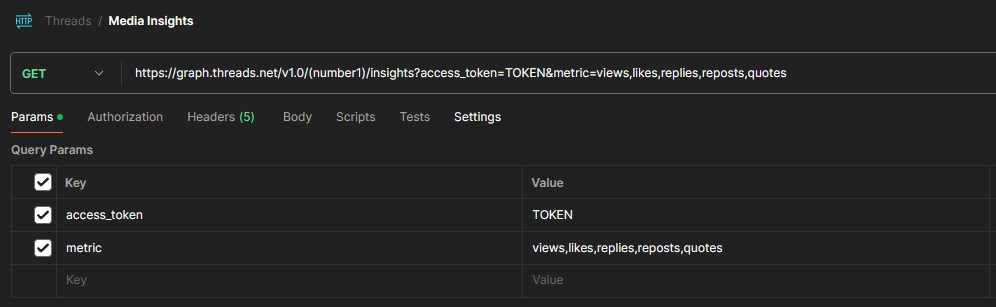
And you’ll get a value for each of the metrcis you’re looking for. For example:
{
“name”: “views”,
“period”: “lifetime”,
“values”: [
{
“value”: (number of views)
}
],
“title”: “Views”,
“description”: “The number of times your post was viewed. “
},
{
“name”: “likes”,
“period”: “lifetime”,
“values”: [
{
“value”: (number of likes)
}
],
“title”: “Likes”,
“description”: “The number of likes on your post.”,
“id”: “(number)”
},
Step 5 – Auto-Looping to Pull All Post Metrics
This step has many different ways to accomplish similar goals. I’ll speak to what worked for me, but how you use automate the data and what tools you use will vary greatly. This is also where we get into potentially the most technically complex.
For me, I had ChatGPT write me a python script that I’m running in google colabs notebook (aka, a place to run python code). With some finagling I got the following code to work for me (though your experience may vary). You can use other methods or tools, this is just what worked for me.
The following code you should be able to copy and paste into a https://colab.research.google.com/ notebook, input your access token in the code (access_token = “(PUT YOUR TOKEN HERE)”) and hit run.
(Note: I don’t normally recommend to take code from the internet, but for training and example purposes I’m showing my raw code. Be careful when running code that you don’t understand or is from sources you don’t trust.)
This code will
- pull all your posts and their metrics with the given parameters supplied in “threads_params”
- run in a loop to continue doing this one by one for all your posts
- format it and write it into a csv file
Your csv will then be in your cloud storage

import requests
import csv
from datetime import datetime
# API URLs
threads_api_url = "https://graph.threads.net/v1.0/me/threads"
metrics_api_url_template = "https://graph.threads.net/v1.0/{post_id}/insights"
# Parameters
access_token = "PUT YOUR TOKEN HERE"
threads_params = {
    "fields": "id,media_product_type,media_type,media_url,permalink,owner,username,text,timestamp,shortcode,thumbnail_url,children,is_quote_post",
    "since": "2024-08-01",
    "until": "2024-08-12",
    "limit": 1000,
    "access_token": access_token,
}
metrics_params = {
    "access_token": access_token,
    "metric": "views,likes,replies,reposts,quotes"
}
# Function to get all thread posts
def get_all_threads():
    response = requests.get(threads_api_url, params=threads_params)
    if response.status_code == 200:
        return response.json()
    else:
        raise Exception(f"Failed to fetch threads: {response.status_code}, {response.text}")
# Function to get metrics for a single thread post
def get_thread_metrics(thread_id):
    url = metrics_api_url_template.format(post_id=thread_id)
    response = requests.get(url, params=metrics_params)
    if response.status_code == 200:
        return response.json()
    else:
        raise Exception(f"Failed to fetch metrics for thread {thread_id}: {response.status_code}, {response.text}")
# Main function to fetch all posts and their respective metrics
def fetch_posts_and_metrics():
    try:
        threads_response = get_all_threads()
        threads = threads_response.get('data', [])
        all_data = []
        for thread in threads:
            thread_id = thread['id']
            metrics = get_thread_metrics(thread_id)
            thread['metrics'] = metrics
            all_data.append(thread)
        return all_data
    except Exception as e:
        print(f"An error occurred: {e}")
        return None
# Function to format and write the data to a CSV file
def write_to_csv(data, filename="output.csv"):
    with open(filename, mode='w', newline='', encoding='utf-8') as file:
        writer = csv.writer(file)
        writer.writerow(["Post Text", "Timestamp", "Post ID", "Media Type", "Views", "Likes", "Replies", "Reposts", "Quotes"])
        for post in data:
            text = post.get('text', '')
            timestamp = post.get('timestamp', '')
            post_id = post.get('id', '')
            media_type = post.get('media_type', '')
            # Format timestamp
            try:
                dt = datetime.strptime(timestamp, '%Y-%m-%dT%H:%M:%S%z')
                formatted_timestamp = dt.strftime("%m-%d-%Y %H:%M")
            except ValueError:
                formatted_timestamp = timestamp
            # Get metrics
            metrics = post.get('metrics', {}).get('data', [])
            views = likes = replies = reposts = quotes = 0
            for metric in metrics:
                name = metric['name']
                value = metric['values'][0]['value']
                if name == 'views':
                    views = value
                elif name == 'likes':
                    likes = value
                elif name == 'replies':
                    replies = value
                elif name == 'reposts':
                    reposts = value
                elif name == 'quotes':
                    quotes = value
            writer.writerow([text, formatted_timestamp, post_id, media_type, views, likes, replies, reposts, quotes])
# Example usage
if __name__ == "__main__":
    all_posts_and_metrics = fetch_posts_and_metrics()
    if all_posts_and_metrics:
        write_to_csv(all_posts_and_metrics)
Step 6 – Analyzing & Example Use Cases
This is where we enter into the fun part (in my data-nerdy opinion), but is also the longest and most varied. Now that you have your data, its time to dig into it and see if you can draw any insights from your posts. There are many different strategies in terms of how to analyze data (which would a different post all together!). If you’re a data nerd (like me!) you can check out a solid intro course to data analysis here.
For me, I took that CSV from the previous step and loaded it into Power BI (a reporting tool) to see averages by certain fields. This is a very basic analysis to see if there are any patterns in the data that could drive different actions.
For example, the average number of likes I got based on what day I posted on
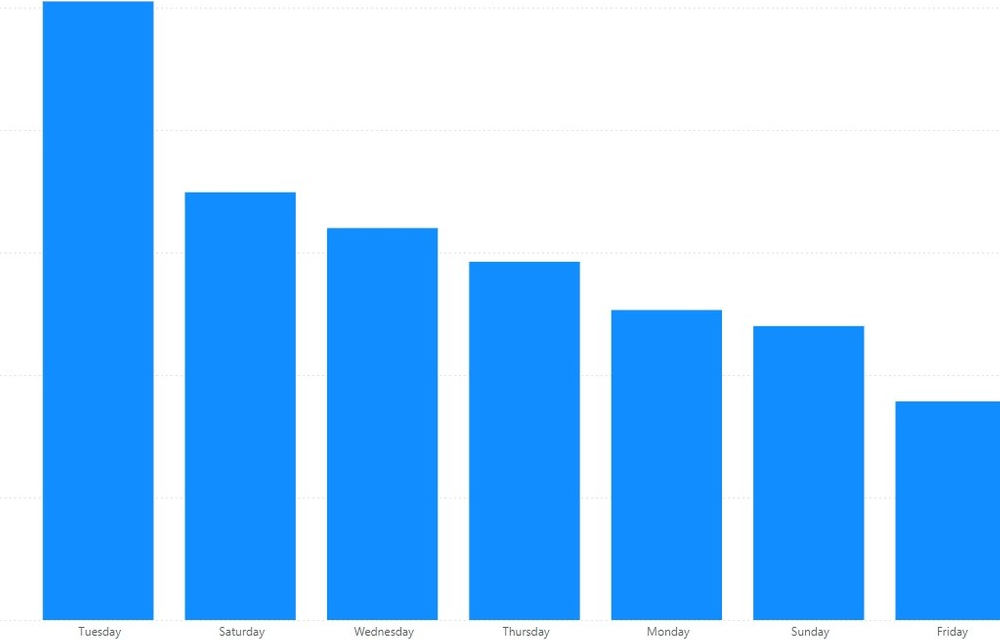
Or to see if when I posted had any impact on the average number of views.

If you’d like me to do a post on some basics of data analysis, let me know in the comments (as it is my day job with almost a decade of experience).
Here’s an example on Threads that I did a little bit ago to showcase how it could be helpful.
Closing
I hope you found this guide helpful! There’s a lot more you could do with the API, like getting into the POST calls and creating/modifying using API, but with just the basics you should be able to gain a little more insight into the metrics of your threads profile or posts. It does seem likely that Threads will add a ‘metrics dashboard’ like they have in Instagram, so don’t worry if you can’t get it set up.
Because I’m doing up this guide after the fact, please feel free to let me know if I missed anything or if anything is unclear so I can update this guide.


Leave a comment or question